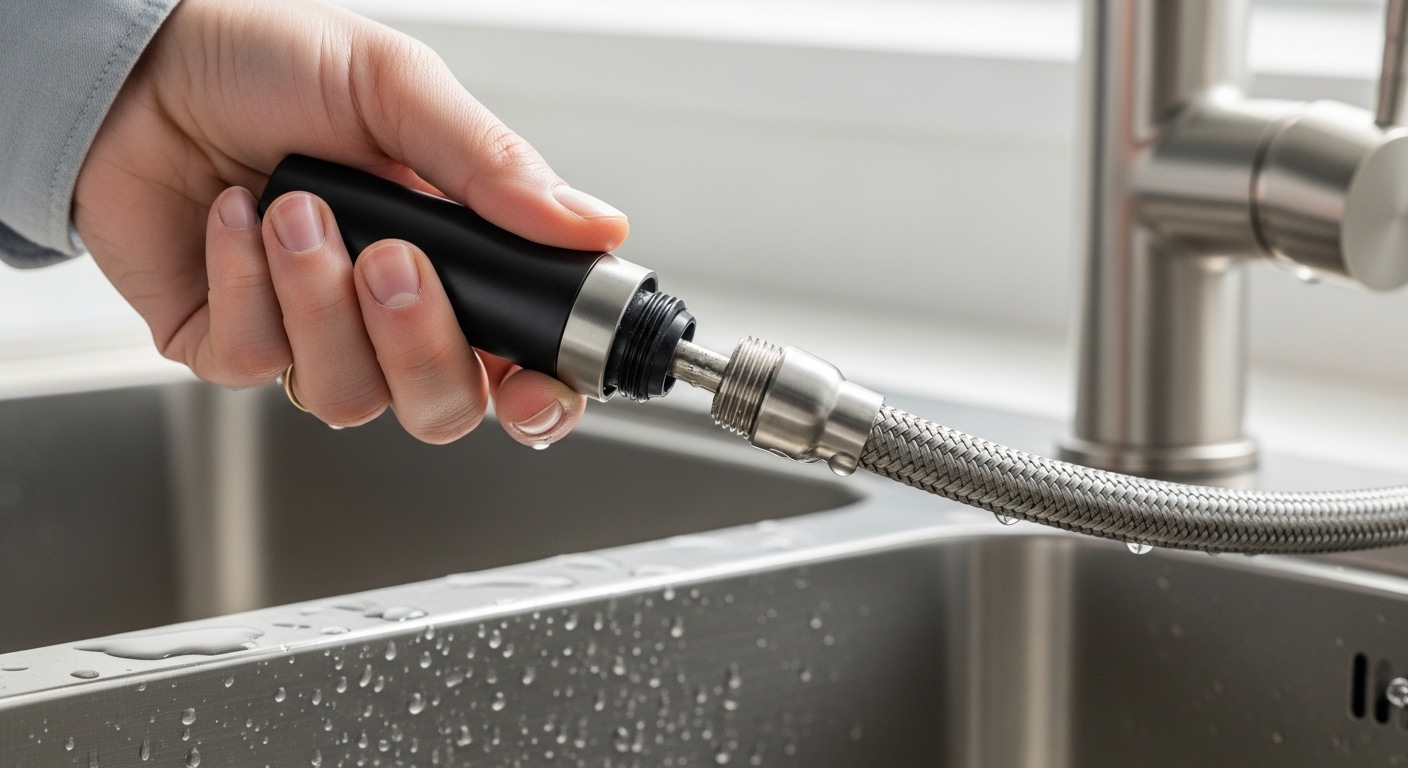
If your sprayer is dribbling, stuck on one mode, or won’t seal against the wand collar anymore, a kitchen faucet replacement head is almost always cheaper and faster than swapping the whole faucet. In most kitchens you can have the new head on in under ten minutes with zero tools — as long as you buy the right connector. The catch is that “the right connector” trips up most people, so the rest of this guide walks you through exactly how to identify what you have, what to buy, and how to install it so it doesn’t leak.
At Cobbe we design and test pull-down kitchen faucets and their spray heads day in and day out, so we see the same three or four mistakes over and over. Below is the plain-English version of everything we tell customers who call in asking, “Can I just replace the sprayer part?”
What exactly is a kitchen faucet replacement head — and is it the same as a spray head?
Yes — a replacement head, spray head, spray wand, and sprayer nozzle all refer to the same part: the handheld business end of a pull-down or pull-out faucet that you grip to aim the water. It houses the aerator, the spray/stream toggle button, and the connector that mates to your faucet’s hose.
It helps to know the three pieces involved so you order the right one:
- The spray head (wand) — the part in your hand. This is what usually wears out and what you’re replacing.
- The hose — the flexible braided or PEX line that retracts into the faucet body. You only replace this if the hose itself is split or leaking.
- The connector/coupling — the threaded or quick-connect fitting between the two. Getting this match right is 90% of the job.
If your problem is water spraying from the hose rather than the nozzle, that’s a different fix — see our guide on why a pull-out kitchen faucet hose is leaking and how to fix it fast before you buy a new head you don’t need. And if you want a deeper primer on the part itself, our explainer on what a kitchen faucet spray head is and how to pick or replace one covers the anatomy in more detail.
How do I know if I need to replace the head or just clean it?
Try cleaning it first — most weak, splitting, or spitting sprayers are just clogged with mineral scale, not broken. Replace the head only if cleaning doesn’t restore flow, the mode button won’t switch, or the plastic collar that seals to the hose is cracked.
Here’s the 5-minute triage we recommend before spending a dime:
- Unscrew the aerator or spray face and soak the head in warm white vinegar for 30–60 minutes to dissolve limescale. This alone fixes the majority of “my sprayer is dying” complaints. Our walkthrough on how to clean a clogged faucet aerator applies directly to spray heads too.
- Test the toggle between stream and spray. If it’s stuck or won’t hold a mode, the internal diverter is worn — that’s a replace.
- Check the seal. Detach the head and look at the collar and O-ring where it meets the hose. Cracks, a missing O-ring, or a stripped thread mean replace.
- Look for drips at the connection. A head that leaks where it joins the hose usually just needs a fresh O-ring or gasket — a 3-dollar fix, not a new head.
Rule of thumb: clean first, reseal second, replace third. A replacement head is the answer when the plastic body, the diverter, or the spray face is physically damaged.
How do I know which replacement head fits my faucet?
Match three things: the connector style (quick-connect clip vs. threaded), the thread size, and the brand’s collar shape. The safest path is a brand-specific head from your faucet’s maker; the most flexible is a universal head with an included adapter kit — but universals only work if the thread diameter matches.
Most pull-down faucets use one of two connection styles:
- Threaded coupling — the head screws directly onto a standard hose end (commonly a 1/2″ or 9/16″ thread). Universal replacement heads are almost always this type.
- Quick-connect / snap coupling — a spring clip or bayonet fitting that clicks in. These are usually proprietary to the brand (Moen, Delta, Kohler, Grohe each have their own), so you’ll want a matching head or a specific adapter.
To identify yours, unscrew the current head, wipe the connector dry, and either measure the thread with calipers or take the old head to the hardware store. If you’re unsure about the internal fitting, our piece on the kitchen faucet hose adapter you actually need shows the common thread sizes side by side, and the guide on figuring out your faucet’s valve size uses the same measuring logic if you’d rather learn it once.
Universal vs. brand-specific replacement heads — which should I buy?
Buy brand-specific if you own a name-brand faucet and want a guaranteed no-leak fit; buy universal if your faucet is off-brand, discontinued, or you want to upgrade the spray pattern cheaply. Universal heads cost less and fit more threads, but they can look slightly mismatched and occasionally need an adapter.
| Type | Typical price | Best for | Watch out for |
|---|---|---|---|
| Brand-specific (OEM) head | $20–$45 | Moen, Delta, Kohler, Cobbe faucets under warranty | Must match exact model; pricier |
| Universal threaded head | $10–$25 | Off-brand or discontinued faucets | Confirm 1/2″ vs 9/16″ thread; finish may not match |
| Universal + adapter kit | $15–$30 | Quick-connect faucets with no OEM part available | Extra connection point = one more spot to seal |
| Whole hose + head assembly | $25–$55 | When the hose is also cracked or leaking | Longer install; verify hose length |
What thread size do most kitchen faucet replacement heads use?
The two most common are a 1/2″-14 (roughly 21 mm outer) coarse thread and a 9/16″ fine thread, with some European faucets using M22 or 15/16″. If you can’t measure precisely, count the connector as “standard garden-hose-ish size” and bring the old head in for a physical match — thread pitch matters as much as diameter, and a near-miss will cross-thread and leak.
How do you install a kitchen faucet replacement head step by step?
You don’t need to shut off the water for a head-only swap in most cases — just don’t turn the faucet on mid-job. Unscrew the old head, transfer or replace the O-ring/weight if needed, hand-thread the new head on straight, snug it a quarter-turn past finger-tight, and test. Total time: 5–10 minutes.
- Extend the hose fully out of the spout so you have room to work.
- Grip and unscrew the old spray head counterclockwise. If it’s seized with scale, wrap a cloth around it for grip or apply vinegar to the threads.
- Inspect the hose end. Clean the threads, check that the O-ring or gasket is intact, and note whether a weight or clip needs to move to the new head.
- Thread on the new head by hand, straight and slow, to avoid cross-threading. Hand-tight plus a gentle quarter turn is enough — over-tightening cracks plastic collars.
- Run the water at low pressure first, check the connection for drips, then test both spray and stream modes.
- Let it retract. Confirm the head docks cleanly back into the spout and the magnet or catch holds.
If your replacement includes a new hose, the job is slightly longer and you’ll usually want to shut off the supply valves under the sink. For the full faucet context, our step-by-step kitchen faucet installation guide covers the under-sink connections in detail.
Why is my new replacement head still leaking or low on pressure?
Nine times out of ten it’s one of three things: a missing or pinched O-ring at the hose connection, a cross-threaded coupling, or leftover scale in the aerator you carried over. Fix the seal and clear the aerator before assuming the part is defective.
Quick diagnostics:
- Drip at the hose joint → reseat the O-ring, make sure it’s not twisted, and re-thread straight. Never use pliers to force it.
- Weak overall flow → the new aerator or the inline screen is clogged, or your home has low pressure to begin with. Soak the spray face in vinegar.
- Water shooting from the top of the head → the internal diverter didn’t seat; unscrew and reseat, checking for debris.
- Head won’t stay docked → the magnetic weight or docking collar wasn’t transferred from the old assembly.
A leak at the head is different from a faucet that’s dripping from the spout itself — if the drip is coming from the base or after you shut the faucet off, that’s a cartridge issue, not a spray-head issue.
How long should a replacement spray head last, and what should I look for in a good one?
A quality spray head should last 5–10 years; the cheapest all-plastic units may fade or stick within a year or two. Look for a metal or metal-effect body, a solid two-mode diverter, a replaceable rubber-nub spray face (easy to descale), and a finish that matches your faucet.
What separates a good replacement head from a throwaway one:
- Rubber/silicone spray nozzles you can wipe scale off with your thumb — these resist hard-water clogging far better than metal pinholes.
- A weighted, positive-locking dock so the head retracts cleanly instead of sagging.
- A finish that matches — brushed nickel, matte black, chrome, or bronze. A mismatched sprayer on a nice faucet is the giveaway of a cheap swap; if you’re chasing a specific look, our take on whether brushed nickel faucets are worth it is a useful sanity check on finishes.
- Certification and warranty. Look for lead-free (NSF/ANSI 61 & 372) compliance and at least a 1-year warranty on the part.
Cobbe spray heads are pressure-cycle tested to simulate years of daily pull-down use and are backed by our replacement-parts warranty, so if a head fails prematurely you’re covered rather than buying the whole faucet again.
FAQ
Can I replace just the spray head without replacing the whole faucet?
Yes — that’s the entire point of a replacement head. As long as the faucet body, valve, and hose are healthy, you only swap the wand. It’s the single cheapest repair on a pull-down faucet and needs no tools in most cases.
Are kitchen faucet spray heads universal?
Some are, some aren’t. Threaded heads are broadly universal if the thread size and pitch match (commonly 1/2″ or 9/16″). Quick-connect heads are usually brand-proprietary, so for Moen, Delta, Kohler, or Grohe you’ll want the matching OEM part or a specific adapter.
How much does a replacement kitchen faucet head cost?
Expect $10–$25 for a universal threaded head, $20–$45 for a brand-specific OEM head, and $25–$55 if you’re replacing the head and hose as one assembly. Compared to $150+ for a new faucet, it’s a bargain.
Do I need to turn off the water to change the spray head?
For a head-only swap, no — just leave the faucet turned off while you work, since the water is held back at the valve. If you’re also replacing the hose, shut off the supply valves under the sink first.
Why does my replacement head keep clogging with low flow?
Hard water. Mineral scale builds up in the aerator and spray face. Soak the head in white vinegar every few months, and choose a head with rubber spray nubs you can wipe clean. If your whole home has hard water, expect to descale two or three times a year.
My replacement head leaks at the hose connection — what’s wrong?
Almost always the O-ring: it’s missing, pinched, twisted, or the head was cross-threaded. Unscrew the head, seat a fresh O-ring flat, and re-thread it straight by hand. Avoid pliers, which crack plastic collars and make the leak worse.
Author note: This guide was written and reviewed by the Cobbe product team, who design, prototype, and lab-test pull-down kitchen faucets and spray heads. Recommendations here reflect real connector standards (1/2″ and 9/16″ threads, NSF/ANSI 61/372 lead-free requirements) and hands-on install experience, not generic web copy. Cobbe (cobbe.net) has been manufacturing and selling kitchen and bathroom fixtures direct to homeowners, with parts backed by warranty and pressure-cycle testing.