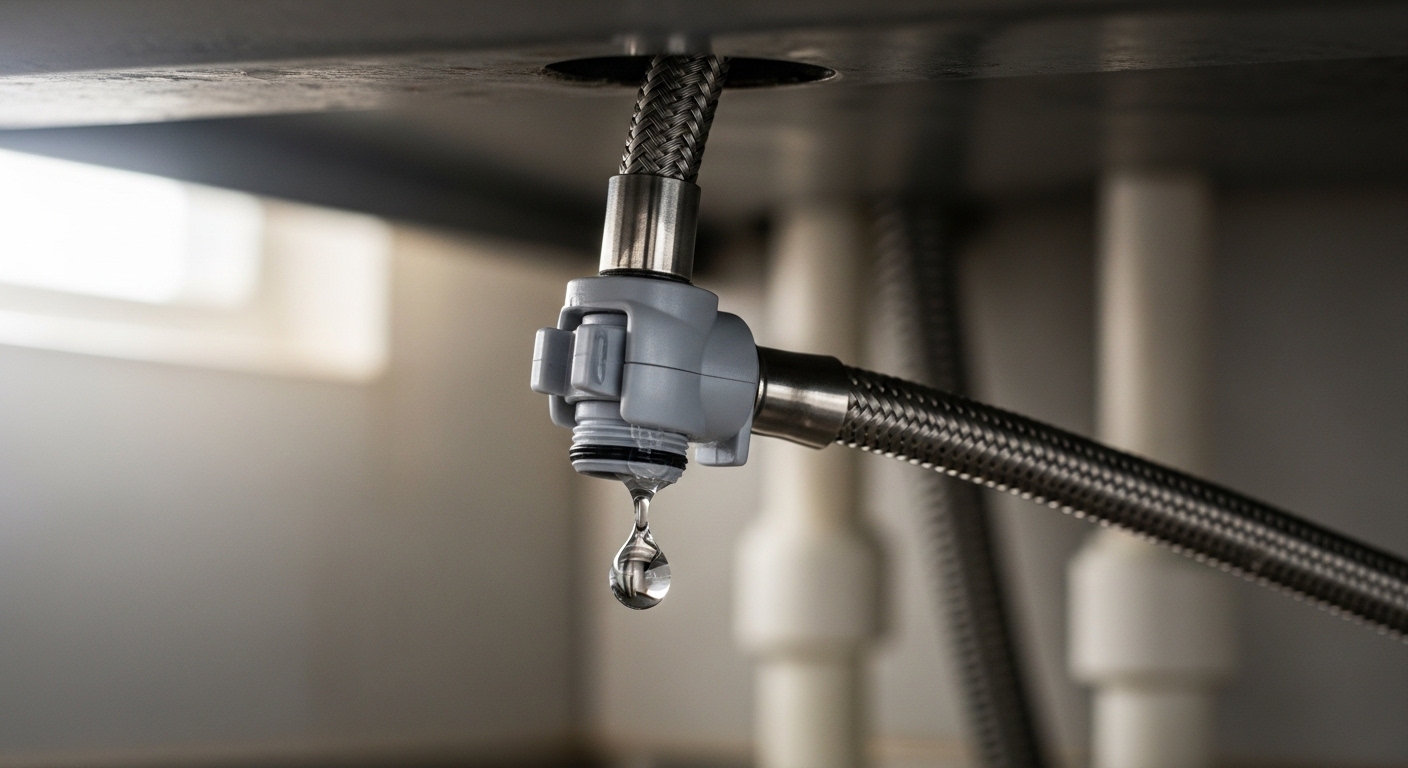
If your pull out kitchen faucet hose leaking problem is dripping under the sink, spraying at the sprayer head, or leaving a puddle in the cabinet every time you run water, the good news is this is one of the most common — and most fixable — kitchen faucet failures. In almost every case the water is coming from one of four spots: the quick-connect coupling where the hose meets the supply line, the connection at the sprayer head, a worn O-ring or gasket, or a hole in the hose itself from years of dragging back and forth through the faucet body. Below we walk through exactly how to find the leak, what it means, and how to stop it — with real specs, a parts comparison, and the tools you’ll actually need.
This is a repair a confident DIYer finishes in 15–40 minutes. Let’s find your leak.
Where is my pull-out faucet hose actually leaking from?
Your leak is almost certainly at one of four points: the quick-connect fitting under the sink, the sprayer-head connection, a worn O-ring/gasket, or a pinhole in the hose itself. Before you buy anything, dry everything off, put a paper towel under each connection, and run the faucet for 30 seconds — the towel tells you exactly which spot is wet.
Here’s how to read each location:
- Quick-connect coupling (under the sink): This is the plastic or brass clip-on fitting where the pull-out hose snaps onto the faucet’s supply tube. If it drips here, it’s usually not fully seated or the O-ring inside is worn. This is the single most common leak point.
- Sprayer-head connection: The threaded joint where the hose screws into the spray head. Look for water running down the hose from the head, or dripping from the wand when you spray. Usually a bad gasket or loose thread.
- The weight/hose body: Pull the hose all the way out and inspect it inch by inch. A kink, crack, or pinhole here means the hose is done — no O-ring fixes a split hose.
- Faucet base/deck: If water pools around the base of the faucet on the countertop (not under the sink), that’s usually a base O-ring or mounting issue, not the pull-out hose.
One quick tell: if water only appears while spraying, suspect the sprayer head or hose. If it drips constantly whether or not you’re using the faucet, suspect the quick-connect or supply-side O-ring under pressure.
Why is my pull-out faucet leaking at the quick-connect fitting under the sink?
The quick-connect fitting leaks when it isn’t fully clicked into place or when its internal O-ring has hardened, flattened, or torn. The fix is almost always to disconnect it, inspect and lubricate or replace the O-ring, then push it back on until it clicks — no tools required on most models.
Quick-connect couplings use a spring clip and a rubber O-ring to hold pressure. Over years of the hose retracting through them, they can shift loose or the O-ring dries out. To fix it:
- Turn off both shut-off valves under the sink and run the faucet to relieve pressure.
- Squeeze or pull the collar to release the quick-connect (mechanism varies by brand — most are a squeeze-clip or a pull-back sleeve).
- Inspect the O-ring. If it’s cracked, flat, or missing, replace it with the exact size (usually a #10 or #11 O-ring; bring the old one to the store).
- Apply a thin film of plumber’s silicone grease — never petroleum jelly, which degrades rubber.
- Push the connector back on firmly until you feel and hear a solid click, then tug gently to confirm it’s locked.
If the coupling itself is cracked, you’ll need a replacement hose assembly. Getting the right thread and fitting size matters here — if you’re unsure what connects to what, our guide on the kitchen faucet hose adapter you actually need walks through matching sprayer, supply, and quick-connect fittings so you don’t buy the wrong part twice.
Can I fix a leaking sprayer head, or do I need a whole new hose?
You can usually fix a leaking sprayer head on its own — most head leaks come from a worn gasket or loose threaded connection at the wand, both cheap fixes. You only need a whole new hose if the hose itself is cracked, kinked permanently, or the fitting is molded onto the hose and can’t be separated.
Unscrew the spray head from the hose (it typically threads on) and check the little rubber gasket or O-ring inside the coupling. If it’s brittle or squished, replace it. Wrap the threads with two or three wraps of PTFE plumber’s tape, then hand-tighten plus a quarter turn with pliers — don’t overtighten plastic threads or you’ll crack them.
If the leak is coming out of the spray head’s face or button when the water is off, that’s a different issue — a failing diverter or spray-head valve, which usually means replacing the spray head itself. A spray head runs $12–$30 for most brands; a full hose assembly runs $15–$40.
What parts fix a leaking pull-out faucet hose, and what do they cost?
The fix depends entirely on where the leak is. Here’s a straight comparison of the common causes, the exact part you need, the rough cost, and the time it takes:
| Leak location | Most likely cause | Part you need | Typical cost | Time |
|---|---|---|---|---|
| Quick-connect (under sink) | Worn/dry O-ring or loose fit | O-ring + silicone grease | $3–$8 | 15 min |
| Sprayer-head thread | Bad gasket or loose thread | Gasket + PTFE tape | $3–$6 | 10 min |
| Sprayer head face/button | Failed diverter/spray valve | New spray head | $12–$30 | 15 min |
| Hose body | Crack, kink, or pinhole | New pull-out hose assembly | $15–$40 | 30–40 min |
| Faucet base on counter | Base O-ring / mounting | Base O-ring kit | $5–$12 | 30 min |
The takeaway: most pull-out hose leaks cost less than $10 in parts. Only a genuinely damaged hose or a failed spray head pushes you toward a $15–$40 replacement — still far cheaper than a plumber’s minimum visit, which typically starts around $150.
How do I replace a pull-out kitchen faucet hose step by step?
To replace the hose, shut off the water, disconnect the hose at both the quick-connect and the sprayer head, feed the old hose out through the faucet body, thread the new hose through the same path, reconnect both ends, and reattach the counterweight. Most people finish in 30–40 minutes with just a flashlight and adjustable pliers.
Here’s the full sequence:
- Shut off the water at both under-sink valves and run the faucet to drain pressure.
- Clear the cabinet and put down a towel — you’ll be working on your back with a flashlight.
- Disconnect the quick-connect where the hose meets the supply tube.
- Remove the counterweight clamped around the hose (note its position — it needs to go back in the same spot for the hose to retract correctly).
- Unscrew the spray head from the top of the hose.
- Pull the old hose out through the faucet spout body from the top.
- Feed the new hose down through the same path, reconnect the spray head, and re-clip the quick-connect until it locks.
- Reattach the counterweight, turn the water back on slowly, and run it for 60 seconds while watching every joint with a dry paper towel.
A common rookie mistake: forgetting the counterweight or clamping it in the wrong place. Without it in the right spot, the spray head won’t retract fully or the hose sags in the cabinet. If your faucet has been giving you trouble beyond the hose — say, a persistent drip at the spout — our guide on why your kitchen faucet is dripping and how to stop it fast covers the cartridge and valve side of the equation, and how to fix a dripping faucet at home pairs well if you want to knock out multiple issues in one session.
Should I repair or just replace the whole faucet?
Repair the hose if the faucet is less than 7–8 years old, the finish still looks good, and only the hose or a gasket has failed — that’s a $10 fix. Replace the whole faucet if it’s older, the cartridge is also worn, the spout has mineral pitting, or you’ve already replaced the hose once and it’s leaking again.
A quality pull-out kitchen faucet is built to last 12–15 years, and the hose is a wear item within that lifespan — it’s normal to replace a hose once or twice over the life of the faucet. So one leaking hose is not a reason to toss the whole unit. But if you’re chasing multiple leaks (hose and a dripping spout and a loose handle), the cumulative cost and hassle often make a fresh faucet the smarter buy.
When you do replace, look for a faucet with a nylon-braided or PEX-lined hose rather than cheap vinyl, a metal (not plastic) quick-connect, and a spray head with a ceramic-disc or silicone-nozzle design that resists mineral buildup. These three details are the difference between a hose that lasts a decade and one that splits in two years.
What tools and habits prevent pull-out hose leaks in the future?
The two biggest causes of premature hose failure are hard-water mineral buildup and mechanical wear from the hose dragging over a rough spout opening. Prevent both and a hose easily outlasts its warranty.
- Descale the spray head every few months if you have hard water. Mineral scale forces the diverter to work harder and can back up pressure into the hose. Our walkthrough on cleaning a clogged faucet aerator uses the same vinegar-soak method that keeps spray heads clear.
- Let the hose retract gently — don’t let it snap back hard against the faucet body.
- Check the quick-connect O-ring once a year with a quick paper-towel test.
- Use silicone grease, not petroleum jelly, whenever you reassemble a rubber O-ring.
- Keep the counterweight positioned correctly so the hose isn’t constantly stressed at one bend point.
If your leak turned out to be at the base or you suspect the internal valve rather than the hose, knowing your kitchen faucet valve size for cartridge replacement saves a second trip to the store.
FAQ
Why is my pull-out faucet hose leaking only when I press the sprayer?
A leak that appears only when you press the spray button points to the sprayer head — usually a worn gasket at the head-to-hose thread or a failing diverter inside the wand. Unscrew the head, replace the gasket, and wrap the threads with PTFE tape. If it still leaks from the head’s face, replace the spray head itself ($12–$30).
Can I use plumber’s tape on a pull-out faucet quick-connect?
No — quick-connect fittings seal with an internal O-ring, not threads, so PTFE tape does nothing and can even interfere with the click-lock. Use PTFE tape only on the threaded sprayer-head connection. For quick-connects, the fix is a fresh O-ring plus a thin coat of silicone grease.
How long should a pull-out kitchen faucet hose last?
A good nylon-braided pull-out hose lasts 8–12 years, though heavy daily use and hard water can shorten that. The hose is considered a wear part, so replacing it once during the faucet’s lifetime is normal. Cheap vinyl hoses may crack in as little as 2–3 years, which is why the hose material matters when you buy.
Is a leaking faucet hose covered under warranty?
Often, yes. Many kitchen faucet brands, including Cobbe, back their faucets with a limited lifetime warranty that covers defective parts like hoses and cartridges — you typically just contact support with your model number and proof of purchase to get a free replacement part shipped. Wear from mineral buildup or improper installation usually isn’t covered, so keep your receipt and register the product.
Why is water dripping under my sink but the faucet works fine?
If the faucet runs normally but water pools in the cabinet, the leak is almost always at the quick-connect coupling or a supply-line connection under the sink, not the visible faucet. Dry everything, run water, and use the paper-towel test at each under-sink joint to pinpoint it. A loose quick-connect or worn supply-side O-ring is the usual culprit.
Do I need to shut off the water to fix a pull-out hose leak?
Yes — always close both under-sink shut-off valves and relieve pressure by running the faucet before disconnecting any hose or fitting. Working on a pressurized line means a face full of water and a flooded cabinet. It takes ten seconds and makes the whole job clean and safe.
A note on expertise and how we test
This guide was written and reviewed by Cobbe’s product and after-sales team, who handle real customer faucet repairs and replacement-part requests every day. Cobbe designs and manufactures kitchen and bathroom faucets, and every pull-out hose and spray head we ship is pressure-cycle tested and built to meet standard cUPC/NSF fixture requirements, backed by our limited lifetime warranty on defective parts. The repair steps above reflect the same diagnostics our support team uses to help customers stop a leak at home instead of paying for a service call. When in doubt about your specific model, reach out with your model number — we’ll help you match the exact O-ring, gasket, or hose you need.
Pingback: How Do You Do a Kitchen Faucet Sprayer Head Replacement Without Replacing the Whole Faucet? - Cobbe
Pingback: What Is a Kitchen Faucet Quick Connector, and How Do You Know Which One Fits Your Faucet? - Cobbe