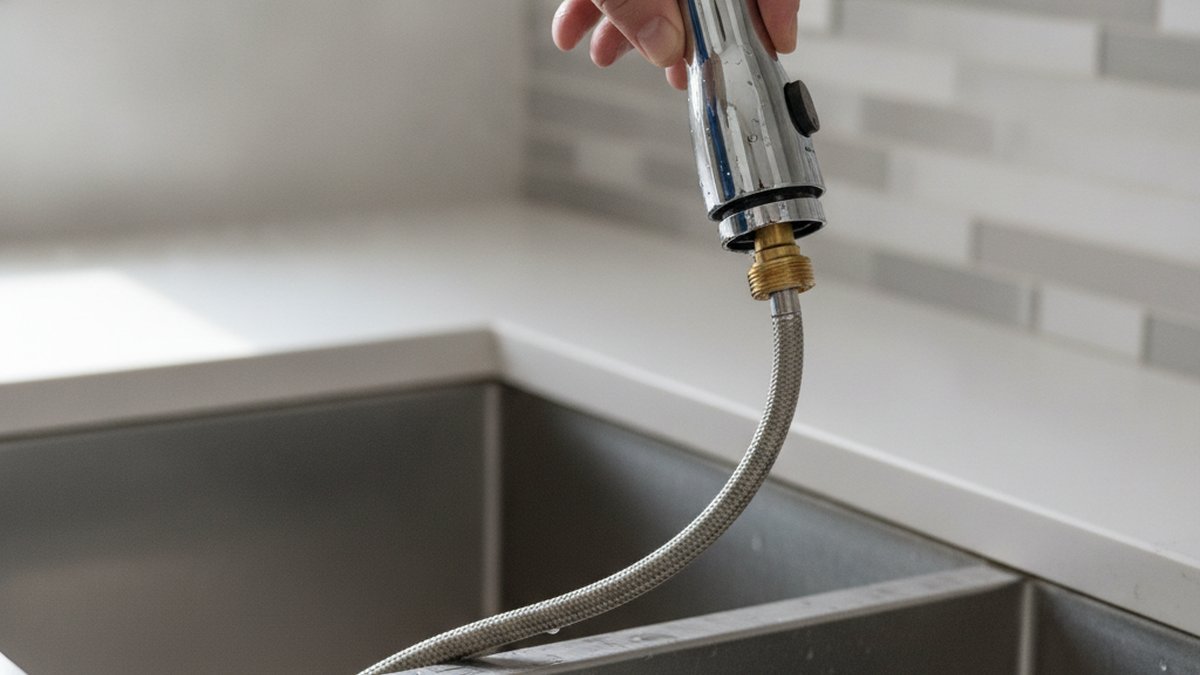
A kitchen faucet sprayer head replacement is the single cheapest fix for a faucet that sprays sideways, dribbles, leaks at the head, or won’t switch between stream and spray — and it costs roughly $12–$40 instead of the $120–$400 you’d spend replacing the faucet. The spray head (also called the wand, pull-down head, or sprayer nozzle) is a consumable part. It clogs with mineral scale, the internal diverter wears out, and the rubber spray nozzles crack over time. Replacing just that head restores full pressure and function while leaving your faucet body, hose, and mounting untouched.
Below, we’ll answer the questions people actually ask before they buy: how to know your head is even the problem, how to match a replacement so it fits the first time, whether universal heads really work, and how to do the swap step by step. We build and test pull-down kitchen faucets at Cobbe, so this is the same guidance we give our own customers.
How do I know if the spray head is the problem, or if it’s the hose or cartridge?
The spray head is the culprit when the problem lives at the nozzle: weak or uneven spray, water shooting in random directions, a mode button that won’t toggle between stream and spray, or dripping from the head after you shut the faucet off. If water is leaking from the hose behind the head or pooling under the sink, that’s a hose or connection issue, not the head — and if your pressure is weak everywhere (not just the sprayer), it’s usually the aerator or the cartridge inside the faucet body.
Here’s a quick way to isolate it. Pull the head out, unscrew it from the hose, and turn the water on gently. If a strong, steady stream comes out of the bare hose, your supply and cartridge are fine and the head is the problem — buy a new head. If the flow from the bare hose is also weak, the restriction is upstream (aerator screen, cartridge, or supply valve), and a new head won’t help.
- Sprays sideways / mister effect: cracked or scaled nozzle rubber → replace the head.
- Won’t switch stream ↔ spray: failed diverter button inside the head → replace the head.
- Drips from the head after shutoff: worn head check valve → replace the head.
- Leaks from the hose or under the sink: hose or weight issue, not the head. See our guide on why a pull-out kitchen faucet hose is leaking.
- Weak flow everywhere: clean or replace the aerator first — here’s how to clean a clogged faucet aerator.
Nine times out of ten, if the trouble is only at the nozzle, the head is the fix. Before you buy anything, it’s worth reading what a kitchen faucet spray head actually is and how the diverter, mode button, and nozzle plate work together — it makes matching a replacement much easier.
What size and type of connector do I need to match a replacement spray head?
You need to match three things: the hose connector thread, the connector type (threaded vs. quick-connect), and the head weight/style. The connector is where 90% of fitment mistakes happen, so measure it before you buy. Most North American pull-down faucets use one of a handful of standard connections, and the replacement head has to thread onto that exact fitting.
To find yours, pull the head out and unscrew it. Look at the end of the hose. You’ll see either male or female threads (measure the diameter across the threads with a caliper or a tape measure) or a plastic push-fit collar (a quick-connect). Bring that measurement — or the old head itself — when you shop. If you’re unsure how thread sizing is written, our explainer on which kitchen faucet hose adapter you actually need breaks down the common thread callouts and when an adapter solves a mismatch.
| Connector type | Typical thread size | Found on | How it attaches |
|---|---|---|---|
| Standard threaded (imperial) | 15/16″-27 | Many US pull-down faucets (Delta, Moen-style) | Screw on by hand, snug with pliers + rag |
| Metric threaded | M22 × 1.25 or M24 | European-style & many import faucets | Screw on; may need a metric-to-imperial adapter |
| Quick-connect (push-fit) | Proprietary plastic collar | Newer pull-down/pull-out models | Push in until it clicks; release tab to remove |
| Ball-joint / weighted hose | Varies by brand | Pull-out sprayers with a hanging weight | Threaded coupling above the ball joint |
A second thing to match is weight and style. A pull-down head that’s too heavy for your spring spout, or too light for a weighted pull-out hose, will hang crooked or won’t retract cleanly. Match the general size, the finish (chrome, brushed nickel, matte black, champagne bronze), and whether it’s a pull-down (docks up into a high-arc spout) or a pull-out (rests horizontally in a lower spout). For the full decision framework, see our companion guide on what a kitchen faucet replacement head is and how to pick the right one.
Do universal replacement spray heads actually fit, or should I buy brand-specific?
Universal spray heads fit most threaded faucets because they usually ship with two or three adapters covering the common thread sizes — but they do not reliably fit quick-connect or proprietary-docking faucets. If your hose ends in standard threads, a good universal head (or a Cobbe replacement head with an adapter kit) is a safe, cheaper bet. If your faucet uses a click-in quick-connect or a magnetic dock unique to one brand, buy the brand-matched head or a universal designed specifically for that system.
The honest trade-off: brand-specific heads guarantee a perfect thread, finish, and docking fit, but they’re often 2–3× the price and can be discontinued on older faucets. Universal heads save money and are widely stocked, but you must verify the thread and accept that the finish may be a near-match rather than an exact one. Here’s how they stack up.
| Factor | Universal replacement head | Brand-specific head |
|---|---|---|
| Price | $12–$30 | $30–$80+ |
| Fitment | Threaded faucets (with adapters) | Exact, incl. quick-connect/docking |
| Finish match | Close, not always exact | Exact |
| Availability | Widely stocked | Can be discontinued |
| Best for | Standard threaded pull-downs | Proprietary quick-connect systems |
One caution: if your faucet is a magnetic-dock, quick-connect design, take a clear photo of the hose end and the underside of the old head before you buy. A universal head that “mostly fits” but won’t dock or click will bounce back out of the spout every time you use it — an annoyance you’ll notice ten times a day.
How do I replace the kitchen faucet sprayer head step by step?
You replace it by unscrewing the old head from the hose and screwing on the new one — no plumber, no shutting off the water supply, and usually no tools beyond a pair of pliers and a rag. Here’s the full process for a standard threaded pull-down or pull-out sprayer. The whole job takes about 10–15 minutes.
- Pull the head out of the spout as far as the hose allows, so you have room to work.
- Unthread the old head by twisting it counter-clockwise off the hose coupling. If it’s stuck with mineral buildup, grip the coupling with a rag-wrapped pliers to hold it steady and twist the head off by hand.
- Check the old rubber washer or O-ring. It usually sits in the coupling or the head. Keep the good one, or use the new washer that comes with the replacement head. A missing or flattened washer is the #1 cause of a post-replacement leak.
- Wrap the hose threads with 2–3 turns of plumber’s (PTFE) tape if the head is metal-to-metal without a washer. Skip the tape if there’s a rubber washer sealing the joint.
- Thread on the new head clockwise by hand until snug, then a quarter-turn more with the rag-wrapped pliers. Don’t overtighten — you can crack a plastic coupling.
- Test before you dock it. Turn the water on low, cycle through stream and spray, and watch the connection for drips. Then guide the hose back so the head docks into the spout.
For a quick-connect system, the steps are even simpler: press the release tab or collar, pull the old head straight off, push the new one in until it clicks, and tug gently to confirm it’s locked. No tape, no threading.
If, once the head is off, you find the leak is actually coming from the hose coupling or a cracked hose, that’s a different repair — but an easy one. The mechanics overlap heavily with a faucet stem replacement you can do yourself, and the same “isolate, unthread, reseal, test” logic applies.
My spray head leaks or drips after I replaced it — what went wrong?
A post-replacement leak almost always means a missing/misseated washer, cross-threaded coupling, or an over-tightened joint that cracked. Back the head off, inspect the rubber washer or O-ring, and re-seat it flat before threading the head back on straight. Nine out of ten “new head still leaks” complaints trace to the seal, not the head itself.
Run through these in order:
- Leak at the head-to-hose joint: washer missing, pinched, or the head is cross-threaded. Remove, inspect, re-thread carefully by hand first.
- Drip from the nozzle after shutoff: a little residual drip for a few seconds is normal (water draining from the hose). Continuous dripping means a faulty check valve — return the head.
- Spray still weak: the aerator/nozzle screen shipped with debris, or the restriction was upstream all along. Clean the screen; recheck the cartridge.
- Head won’t dock or keeps popping out: wrong weight/style for your spout, or a quick-connect mismatch. Swap for the correct docking type.
If the leak is coming from behind the head, up the hose, or under the sink, the head isn’t your issue — trace it back to the hose or the faucet body. Our pull-out hose leak guide walks through weight, coupling, and hose-crack fixes.
How long should a replacement spray head last, and how do I make it last?
A quality replacement spray head lasts 5–10 years; cheap ones fail in 1–2. The single biggest killer is mineral scale from hard water, which clogs the nozzles and jams the diverter. You extend its life dramatically by wiping the rubber nozzles clean and periodically soaking the head in white vinegar to dissolve scale — the same routine that keeps the whole faucet flowing.
Practical habits that add years:
- Descale monthly in hard-water areas: rub the rubber nozzle tips with your thumb under running water to pop off scale; soak the head in a bag of white vinegar for an hour if flow drops.
- Don’t yank the hose: pull the head out gently and let it retract slowly — snapping it back stresses the coupling and the docking weight.
- Match the finish to your water: matte black and champagne bronze hide water spots better than polished chrome in hard-water homes.
- Buy a solid-brass or metal-cored head over all-plastic if it’s within budget — it survives heat and mineral cycling far better.
If your whole faucet is over 10–12 years old, the finish is flaking, or replacement heads for it are discontinued, that’s the point where a new pull-down faucet makes more sense than another head. But for a functional faucet with a bad nozzle, the head swap is the smart, low-cost fix nearly every time.
FAQ
Can I replace a kitchen faucet spray head myself without a plumber?
Yes. For threaded and quick-connect sprayers it’s a 10–15 minute DIY job with no water shutoff and, at most, a pair of pliers and a rag. The only time you’d want a pro is if the hose or the faucet body itself is damaged, not just the head.
Are kitchen faucet spray heads universal?
Partly. Universal heads fit most threaded faucets because they include common-size adapters (like 15/16″-27 and M22). They do not reliably fit proprietary quick-connect or magnetic-docking systems — for those, buy a head made for that connector or the brand-specific part.
How do I know what size replacement spray head to buy?
Unscrew the old head and measure the hose thread diameter, or simply bring the old head to the store. Note whether it’s threaded (imperial like 15/16″, or metric like M22) or a push-in quick-connect, and match the weight/style (pull-down vs. pull-out) and finish.
Why is my new spray head still leaking?
Almost always the rubber washer or O-ring is missing, pinched, or the head is cross-threaded or overtightened. Remove it, seat the washer flat, and thread it back on straight by hand before snugging. A few seconds of drip after shutoff is normal draining, not a leak.
How much does a kitchen faucet sprayer head replacement cost?
The part runs about $12–$40 for a universal head and $30–$80 for a brand-specific one. Since you can install it yourself, that’s usually the total cost — a fraction of the $120–$400 you’d spend replacing the entire faucet.
Will a new spray head fix low water pressure?
Only if the restriction is in the head itself (scaled nozzles or a clogged screen). If pressure is weak from the bare hose too, the problem is upstream — clean the aerator or check the cartridge and supply valves. Test the bare hose first to find out.
About the author: This guide was written by the Cobbe product team, who design, assemble, and pressure-test pull-down and pull-out kitchen faucets and replacement spray heads. Every Cobbe spray head is cycle-tested for diverter reliability and checked against standard hose thread sizes so replacements fit common faucets on the first try.
Why trust Cobbe: Cobbe is a dedicated kitchen and bath fixtures brand at cobbe.net specializing in faucets, spray heads, and sink hardware. Our replacement heads are built with lead-free, cUPC-oriented materials and backed by a limited warranty; components are tested for flow consistency and leak resistance before they ship. Always follow the fitment and installation guidance above, and keep your proof of purchase for warranty coverage.