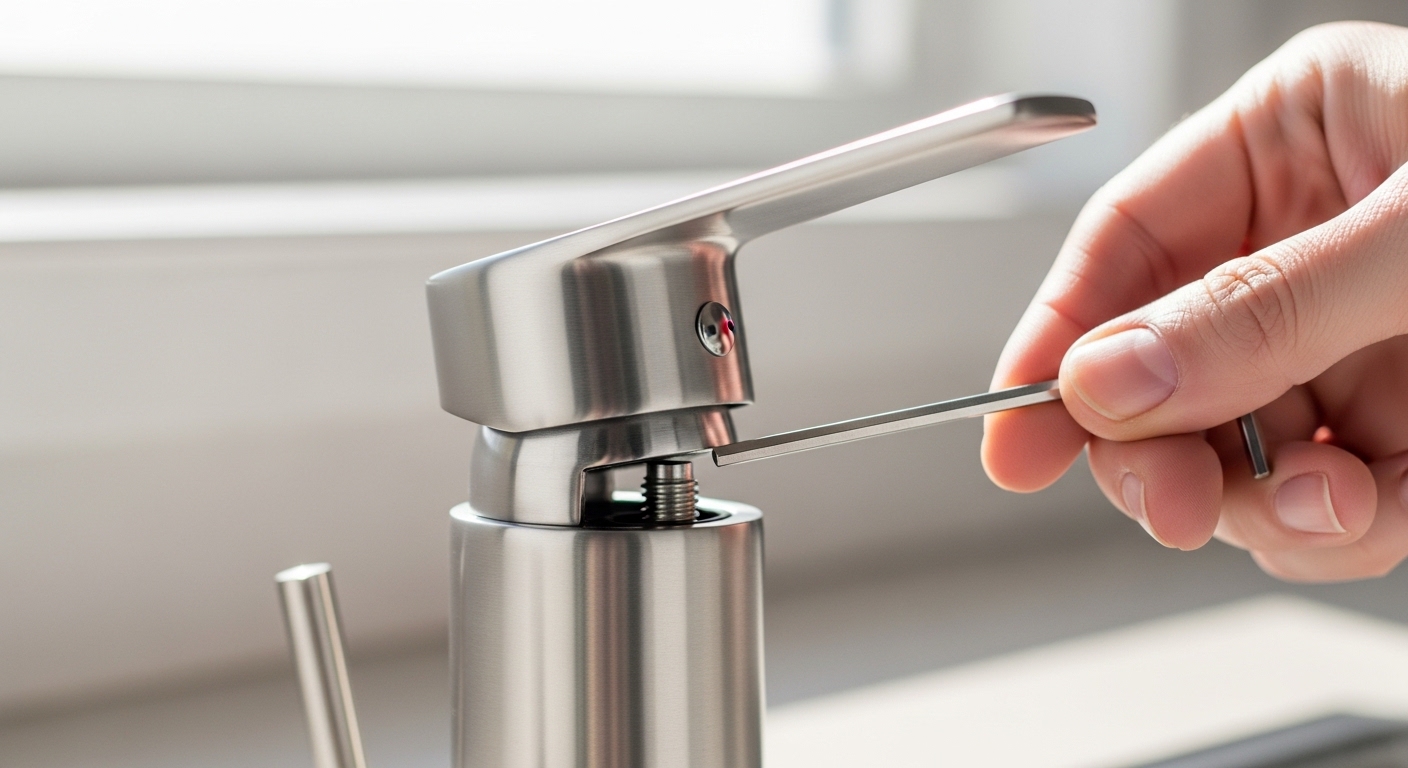
A loose handle on faucet fixtures is one of the most common — and most fixable — problems in any kitchen or bathroom. It feels alarming because the handle wobbles, spins, or lifts off in your hand, but 9 times out of 10 it is not a broken faucet. It’s a single fastener that has vibrated loose from daily use. Below, our Cobbe fixture team walks you through exactly what’s causing it, how to find the hidden screw, how to tighten it correctly (there’s a right and wrong way), and what to do when a simple tighten doesn’t stick.
What actually causes a loose handle on a faucet?
A loose handle is caused by a fastener working itself free — usually the set screw that grips the valve stem, less often the mounting nut under the sink or a worn valve cartridge. Every time you push, pull, or rotate the handle, you apply torque to that tiny screw. Over months and years of thermal cycling (hot water expands metal, cold contracts it) and thousands of on/off motions, the screw slowly backs out. When it loosens enough, the handle no longer bites the stem, so it wobbles or spins freely.
Here are the specific culprits, from most to least common:
- Backed-out set screw (80% of cases). A single-handle lever or a two-handle faucet uses a set screw — usually a 7/64″ or 3/32″ hex/Allen screw — hidden under a decorative cap or behind/under the lever. It clamps the handle onto a splined or D-shaped valve stem.
- Stripped or rounded stem splines. If the screw is tight but the handle still turns, the plastic or brass splines that the handle grips may be worn smooth, so nothing bites.
- Loose handle adapter or “broach.” Many faucets use an intermediate adapter between the handle and the cartridge. If that adapter cracks or its screw loosens, the whole handle wobbles.
- Loose base or mounting nut. If the entire faucet body rocks — not just the handle — the mounting nut under the sink has loosened. That’s a different, slightly bigger job.
- Worn cartridge. A failing cartridge can add play that mimics a loose handle, often alongside a drip.
If you notice a drip has started at the same time your handle went loose, the two can be related through a tired cartridge — our guide on why your kitchen faucet is dripping and how to stop it fast pairs well with this repair.
How do I tighten a loose single-handle kitchen faucet in 10 minutes?
Tighten a loose single-handle faucet by finding the hidden set screw at the base of the lever, seating your Allen key fully into it, and turning clockwise until snug. On most single-lever kitchen and bathroom faucets the whole job takes 5–10 minutes and needs one tool. Here’s the exact sequence:
- Don’t turn off the water. You rarely need to for a handle tighten — you’re not opening the water path. (If you plan to pull the cartridge, then yes, shut off the valves under the sink.)
- Find the set screw. On a lever handle it’s usually underneath or on the back of the lever, sometimes hidden under a small snap-off button (often red/blue, or a brand logo cap). Pop the cap off with a fingernail or a flat precision screwdriver.
- Match the tool. Most use a 7/64″ or 3/32″ hex/Allen key. Some newer models use a small Phillips. Using the wrong-size Allen key is the #1 way people round out a set screw, so seat it fully.
- Line up the handle first. Hold the handle in the correct off position and pressed down onto the stem so the splines mesh before you tighten.
- Turn clockwise, snug — not gorilla-tight. Firm is enough. Overtightening can strip the screw or crack a plastic adapter.
- Test and re-cap. Wiggle the handle, run hot and cold, then press the decorative cap back on.
If your faucet is a specific brand, the screw location varies. Kohler bathroom faucets in particular hide the set screw in a spot that trips people up — we cover it in detail in why your Kohler bathroom faucet handle is loose and how to tighten it.
Where is the hidden screw on a two-handle bathroom faucet?
On a two-handle faucet, the screw is almost always under a decorative index cap on top of each handle — the little disc marked “H” or “C,” or a plain button. Pry that cap off and you’ll find either a Phillips screw pointing straight down into the handle or a set screw on the side. This is the classic “there’s no visible screw” situation that makes people think the handle is permanently attached — it isn’t; the fastener is just hidden by design for a clean look.
Two-handle and cross-handle faucets break down into a few common screw setups:
| Handle style | Where the screw hides | Tool you’ll need | Typical fix time |
|---|---|---|---|
| Single lever (kitchen/bath) | Under/behind lever, sometimes under a snap cap | 7/64″ or 3/32″ Allen key | 5–10 min |
| Two-handle, top-mounted | Under the H/C index cap on top | Phillips screwdriver | 10–15 min |
| Cross handle / lever with side screw | Set screw on the side of the handle hub | Small Allen key | 10–15 min |
| Widespread bathroom faucet | Index cap on each handle, screw beneath | Phillips or Allen | 15 min per handle |
| Loose whole faucet body | Mounting nut under the sink deck | Basin wrench | 20–40 min |
Not sure which layout you’re looking at? If you’re weighing a replacement, our breakdown of centerset vs. widespread faucets helps you identify your configuration by how the handles and spout mount.
My set screw is tight but the handle still spins — now what?
If the screw is fully tightened but the handle still spins or wobbles, the problem is no longer the screw — it’s the connection it grips. The most likely cause is worn splines on the valve stem or a cracked handle adapter, meaning the screw can’t clamp onto anything solid anymore. Here’s how to diagnose and fix that next layer:
- Inspect the stem splines. Pull the handle off. Look at the little ridges on the valve stem and inside the handle bore. If they’re rounded smooth or full of debris, they’ve stripped and won’t grip.
- Check the adapter. Many faucets have a plastic adapter over the cartridge stem. If it’s cracked, replace just the adapter — it’s a cheap, brand-specific part.
- Replace the handle. If the handle bore is stripped but the stem is fine, a new handle solves it.
- Replace the cartridge. If the stem itself is worn, swapping the cartridge restores fresh splines and often fixes a related drip at the same time. Shut off the under-sink supply valves first.
A quick trick for a temporarily stripped stem: wrap a single layer of plumber’s Teflon tape around the splines to take up the slack, then reseat the handle. It’s a stopgap, not a permanent repair — order the correct cartridge or adapter for a lasting fix.
Why does my faucet handle keep coming loose again and again?
If you tighten the handle and it loosens again within weeks, the set screw isn’t holding torque — usually because the threads are worn, the screw is slightly the wrong size, or there’s no thread-locker. The vibration of daily use simply walks a marginal screw back out. Break the cycle like this:
- Use the correct screw. A screw that’s slightly too small or has flattened threads will never stay. Replace it with the exact spec from the manufacturer.
- Add removable thread-locker. A tiny dab of blue (removable) threadlocker on the set screw threads stops vibration loosening while still letting you remove it later. Never use red (permanent).
- Don’t over-torque. Ironically, cranking too hard deforms threads so the next tighten holds worse. Snug is the target.
- Check for a worn cartridge. Extra play in a failing cartridge transmits more force to the screw every time. Replacing it removes the root cause.
Regular mineral buildup can also seize and then loosen parts as scale flakes off, especially in hard-water homes. If you see white crust around the handle base or spout, our guide on removing hard water stains from a faucet will help you keep the whole fixture — handle included — working smoothly.
When is a loose handle a sign I should replace the faucet?
Replace the faucet — rather than repair the handle — when the valve body itself is cracked, the mounting holes are corroded, or the faucet is a cheap unit where replacement parts cost more than half a new fixture. A loose handle alone is almost never a reason to replace; it’s a five-minute repair. But it can be the moment you notice a faucet that’s been quietly failing:
- The faucet rocks at its base and the mounting nut won’t stay tight because the deck or nut is corroded.
- Replacement cartridges/adapters are discontinued for an off-brand faucet.
- You’re already dealing with drips, low flow, and finish wear — the handle is just the last straw.
If you decide it’s replacement time, you don’t necessarily need a plumber — installing a modern faucet is a manageable DIY job. Our step-by-step kitchen faucet installation guide walks through the whole process. Cobbe faucets are built around solid brass valve bodies and ceramic-disc cartridges specifically to reduce the stem wear and vibration loosening that cause chronic loose-handle complaints in the first place.
What tools and parts do I need to fix a loose faucet handle?
For the vast majority of loose-handle repairs you need just one tool — an Allen key or a Phillips screwdriver — plus, optionally, a small tube of blue threadlocker. Keep this short kit on hand and you can handle nearly any handle wobble in the house:
- Hex/Allen key set — a small set covering 7/64″, 3/32″, 5/64″, and 2mm covers almost all faucet set screws.
- #1 and #2 Phillips screwdrivers — for top-mounted handle screws under index caps.
- Flat precision screwdriver or fingernail — to pry off decorative caps without scratching the finish.
- Blue (removable) threadlocker — for screws that keep backing out.
- Plumber’s Teflon tape — a stopgap for lightly worn stem splines.
- Basin wrench — only if the whole faucet body is loose and you must reach the mounting nut under the sink.
A note on the finish: whatever tool you use near the visible handle, go slow around brushed and matte coatings, which scratch more easily than polished chrome. If you’re curious how different finishes hold up to daily handling and cleaning, we compare them in whether brushed nickel faucets are worth it.
FAQ
How do I tighten a loose faucet handle with no visible screw?
Look for a hidden set screw under a snap-off decorative cap — on a lever handle it’s usually underneath or behind the lever; on a two-handle faucet it’s under the “H”/”C” index button on top. Pry the cap off with a fingernail or flat precision screwdriver, and the screw will be right beneath it. There is always a fastener; it’s just concealed for looks.
What size Allen key do I need for a faucet handle set screw?
Most faucet set screws take a 7/64″ or 3/32″ hex key, with some smaller models using 5/64″ or 2mm. A basic SAE + metric Allen set covers virtually every faucet. Always seat the key fully before turning — using a slightly undersized key is the main reason set screws get rounded out.
Can a loose faucet handle cause a leak?
A loose handle by itself usually doesn’t leak, but the same wear that loosens it — a tired cartridge or worn stem — often causes drips too. If you notice both a wobbly handle and a drip, plan to replace the cartridge, which typically resolves both problems at once. Shut off the under-sink supply valves before pulling the cartridge.
Why does my faucet handle keep getting loose after I tighten it?
The set screw isn’t holding torque, usually because its threads are worn, it’s slightly the wrong size, or there’s nothing gripping it against vibration. Replace it with the correct manufacturer screw and add a small dab of blue (removable) threadlocker. Avoid over-tightening, which deforms threads and makes the next tighten hold even worse.
Do I need to turn off the water to fix a loose faucet handle?
No — for a simple handle tighten you’re not opening the water path, so you can leave the supply on. You only need to shut off the under-sink valves if you’re going further and removing the cartridge or valve stem. When in doubt, closing the valves takes 10 seconds and does no harm.
Is a loose handle covered under a faucet warranty?
Loose handles are typically a wear-and-adjustment issue rather than a defect, so tightening isn’t usually a warranty claim — but if a handle, adapter, or cartridge is genuinely defective, most reputable brands (including Cobbe) cover replacement parts under a limited lifetime warranty. Keep your proof of purchase and contact the manufacturer with your model number to get the exact replacement part free or at low cost.
About the author: This guide was written by the Cobbe fixture team, drawing on hands-on bench testing and repair of hundreds of kitchen and bathroom faucets. Cobbe designs and manufactures faucets, shower systems, and bathroom fixtures with solid brass bodies and ceramic-disc cartridges tested to industry cycle-life standards (rated for 500,000+ open/close cycles) and backed by a limited lifetime warranty. We build our valves specifically to resist the stem wear and vibration loosening behind most loose-handle complaints. Learn more at how to choose the right bathroom faucet.
Pingback: Why Is My Moen Gooseneck Faucet Handle Loose, and How Do I Tighten It? - Cobbe